As a homeowner, conducting regular roof inspections is an important part of responsible home maintenance. Neglecting to do so can lead to unnoticed damage and costly repairs down the line. While hiring a professional roofing contractor to conduct an inspection is always advisable, for those on a tight budget, a DIY roof inspection checklist can still provide valuable information about your roof’s condition and help identify any issues early on.
By setting aside a few hours on a sunny day and equipping yourself with the proper safety gear and a checklist of what to look for, you can save money and gain peace of mind about this critical component of your home. With some basic knowledge, the right tools, and a methodical approach, a DIY roof inspection is achievable for most homeowners. Today I will cover how to thoroughly check your roof for signs of damage or deterioration to determine if calling a professional is necessary.
Why Do a DIY Roof Inspection?
Performing your roof inspection allows you to spot potential issues early and repair or replace your roof before serious damage occurs. It also gives you peace of mind in knowing the current state of your roof.
There are a few reasons why a DIY roof check is a good idea:
Save money: Identifying problems early means you can repair or replace limited sections of your roof instead of the entire roof, saving thousands of dollars. Minor repairs are also less costly than major replacements.
Prevent leaks and water damage: Checking for and fixing small cracks, tears or holes in your roofing material, seals, and flashing helps prevent water from seeping in and causing damage to your attic, ceilings, and walls.
Ensure safety: Spotting loose, damaged, or missing shingles, tiles, or other roofing components and securing or replacing them helps prevent injury from falling debris. It also reduces the chance of leaks that could lead to mold growth.
Plan for replacement: If your inspection uncovers signs that your roof is nearing the end of its lifespan, you have time to save money for a replacement and do research to determine the best new roof for your home.
Extend roof life: Making minor repairs and sealing up small problems found during your inspection helps prevent further deterioration and can add years of life to an aging roof.
Peace of mind: An inspection gives you an assessment of your roof’s current condition so you know its general state of repair and can feel confident in or address any issues with its performance, durability or safety.
In summary, a DIY roof check allows you to catch issues early, prevent costly damage, ensure safety, plan for the future, extend the life of your roof, and gain peace of mind about this important asset. It’s well worth the time and effort for any homeowner.

When to Perform DIY Roof Inspections
You should perform regular DIY inspections to inspect your roof, especially after major weather events properly.
When to Inspect
It is recommended that homeowners inspect their roofs at least twice a year, in the spring and fall. Spring inspections should be done after the last snow has melted, allowing you to check for any damage that may have occurred over the winter. Fall inspections should be completed before the first snowfall. You should also inspect after major storms, as high winds or hail can cause damage.
Carefully examine your roof for any visible damage or wear and tear. Walk around the entire roof perimeter, checking for issues like cracked, warped, or missing shingles. Inspect areas where the roof meets vertical surfaces like chimneys or dormers, as water can collect in these spots. Check that all flashing, seals, and cement used in these areas are intact and securely fastened.
Examine overhead power lines to ensure they are not contacting or hanging over the roof, as this can be a fire hazard. Inspect areas under skylights, as condensation buildup can lead to leaks. Check that all vents, pipes, and exhaust outlets are securely installed and debris-free.
While most damage will be visible from the ground, it is best to get up on the roof for a thorough inspection. Exercise extreme caution, as roofs can be slippery and the risk of falls is high. If you do not feel comfortable doing this yourself, consider hiring a professional to inspect and repair your roof. Regular inspections and timely repairs or replacement of damaged components will help ensure your roof’s maximum lifespan and performance.
What to Look for During Your Roof Inspection
Roof Surface
Carefully inspect all roof surface areas for signs of damage or deterioration. Look for cracks, holes, rust spots, or stains in the roofing material, especially around vents, skylights, or the chimney. Check that shingles, tiles or panels lie flat and are securely installed. Look for raised or loose edges which can trap moisture and lead to leaks. Shingles that are curled, cracked, or have significant granule loss nearing expiration.
Gutters and Downspouts
Examine gutters and downspouts to ensure water can flow freely away from the roof. Look for warping, corrosion, or damage in gutters, and any debris blocking water flow. Check that downspouts are securely connected to gutters and extend at least 6 feet away from the home’s foundation to prevent water pooling around the base of the building. Clogs or inefficient water diversions can lead to water overflow, leaks, and water damage.
Flashings
Flashings are the seals around vents, skylights, chimneys and other protrusions in the roof. Look for tearing, warping, or detachment of the flashing material. Check that the flashing edges lie flat and securely seal around the base of the protrusion. Damaged or inefficient flashings can allow water to seep under shingles and cause leaks.
Ventilation
Inspect all ventilation systems – including attic fans, exhaust vents, and air intakes – to ensure proper airflow and prevent heat and moisture buildup. Check that ventilation openings are clear of any blockages. Inefficient ventilation can lead to damage to roofing materials and structures.
Performing regular DIY inspections of your roof and exterior structure helps identify minor issues before they become major problems. Take the time to thoroughly check all areas of your roof and note any necessary repairs to prevent costly damage further down the road. Addressing problems when they arise will help maximize the lifespan of your roof.
DIY Roof Inspection Equipment Needed
To thoroughly inspect your roof, you will need some essential equipment. Gather the following items before heading up:
Ladder
A sturdy ladder will allow you to access all areas of your roof safely. For two-story homes, an extension ladder is recommended. Place the ladder on even, solid ground and have someone spot you as you climb.
Binoculars
Binoculars enable you to get a close-up view of your roof from the ground. Scan for any visible damage, debris or leaks before climbing up. Look for cracked, warped or missing shingles and damaged gutters or vents.
Flashlight
A flashlight will help illuminate shady areas under solar panels or near chimneys. Look for water damage, mold, or structural damage in these spots. A headlamp can be useful for keeping your hands free.
Roofing cement or sealant
For minor damage like small cracks or holes, roofing cement or sealant can provide a temporary solution until full repairs are made. Carry some with you in case you need to seal any leaks.
Protective gear
Wear rubber-soled shoes, work gloves, and weather-appropriate clothing for safety and comfort. Consider a harness system for steep or multi-level roofs.
Notepad and camera
Document any issues you find by writing descriptions in a note pad and taking photos. This will help diagnose problems and plan necessary repairs with a professional roofer.
With the proper safety precautions and equipment, a DIY roof inspection can give you peace of mind about the condition of your roof or alert you to problems early on. Conduct inspections at least once a season and after major storms to catch issues immediately. By checking your roof thoroughly, you can help maximize its lifespan and avoid costly damage down the road.
How to Safely Access Your Roof for Inspection
When performing a DIY roof inspection, thoroughly checking your roof’s surface and structure is critical to identify potential issues before they become major problems. Carefully accessing your roof to get a closer look at all areas will allow you to spot trouble spots that could lead to leaks or structural damage if left unaddressed.
Use a ladder for single-story roofs
For single-story roofs, a sturdy ladder will provide safe access. Place the ladder on level ground and lean it against the roof’s edge at a 75-degree angle. Climb up while maintaining three points of contact with the ladder at all times. Once on the roof, move slowly and carefully, especially if the surface is steep. You may consider using roof jacks or a harness for added safety on slick or sloped roofs.
Use proper fall protection for multi-story roofs
If accessing a roof more than one story up, proper fall protection equipment like a harness, guardrails, or nets should be used to prevent injury from falls. Fall protection training may also be required to ensure equipment is used properly. Consider hiring a professional to inspect multi-story roofs to avoid the risks of accessing higher roofs yourself.
Inspect the roof surface and flashing
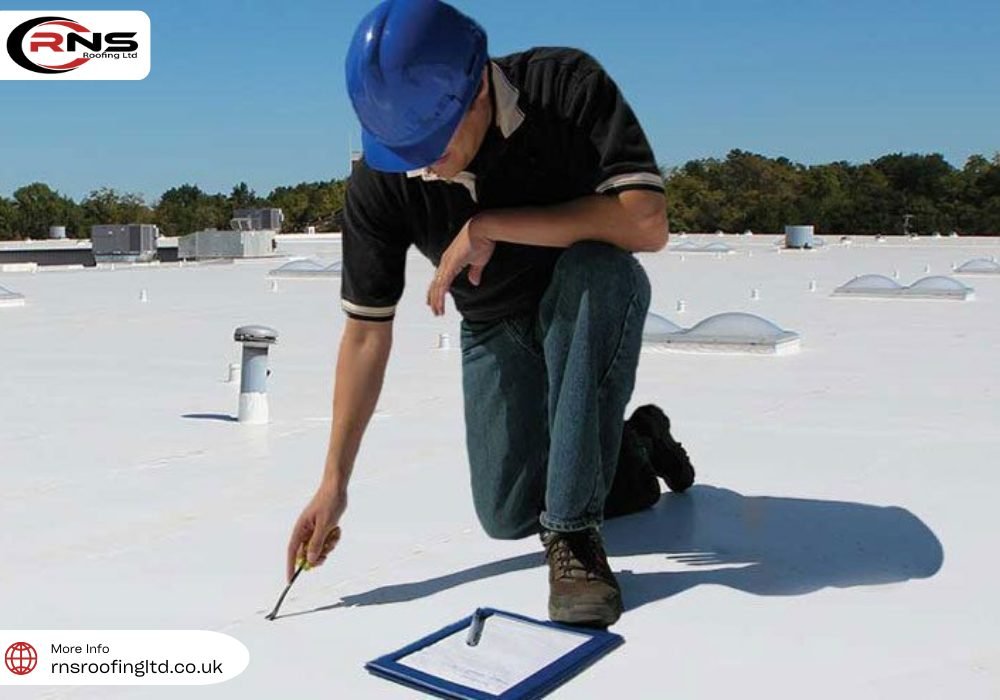
Once on the roof, thoroughly check the surface for any visible damage, debris, or leaks. Look for cracked, curled, or missing shingles or tiles. Inspect metal roofs for dents, rust, or seams that are coming apart. Check all flashing around chimneys, skylights, and vents for any damage or areas that are pulling away from the roof. Flashing that is no longer sealed can lead to leaks into the attic and interior ceilings.
Check under the roof for structural issues
For certain roof types like composite or wooden shake roofs, you may be able to lift some shingles or tiles to view the underlying waterproof membrane and roof deck. Look for any water stains, mold, or areas where the decking is sagging or pulling away from the rafters. Major structural damage will require a professional roof repair or replacement to avoid collapse.
Performing routine DIY roof inspections and catching issues early can help maximize the lifespan of your roof and avoid costly repairs down the line. However, for multi-story or severely damaged roofs, it is best to hire a professional to conduct inspections and any necessary repairs or replacements for safety and to ensure the work is done properly according to building codes.
Conclusion
You have now learned how to thoroughly inspect your roof for any signs of damage or deterioration. While a professional roof inspection by a licensed contractor is ideal, performing regular DIY inspections of your roof in between professional inspections is a smart way to catch any developing issues early. By walking around the entire perimeter of your roof, checking for visible damage or debris, inspecting vents and seals, and looking in the attic for water stains, you can identify problems and address them before they become serious.
Taking the time to inspect your roof gives you peace of mind that your home’s first line of defense against the elements is in good working order. Be sure to schedule a professional roof inspection at least once every few years for the most comprehensive assessment of your roof’s condition. With consistent monitoring and care, your roof should provide many years of safe and reliable protection for your home.
People Ask Questions About Roof Inspection Checklist
Why is a roof inspection checklist important?
A roof inspection checklist identifies potential issues with a roof’s structure, materials, and overall condition. Regular inspections help prevent costly repairs and extend the lifespan of the roof.
Who should use a roof inspection checklist?
Roofing contractors, property managers, homeowners, and building inspectors should use a roof inspection checklist to ensure that roofs are maintained properly and meet safety standards.
How often should a roof inspection be conducted?
Roof inspections should be conducted at least twice a year – once in the spring and once in the fall. Additionally, immediate inspections may be necessary after severe weather events, such as storms or hail.
What tools and equipment are needed for a roof inspection?
Roof inspectors commonly use tools such as binoculars, a ladder, a flashlight, safety gear (e.g., harness and helmet), and a digital camera or smartphone to document findings.

