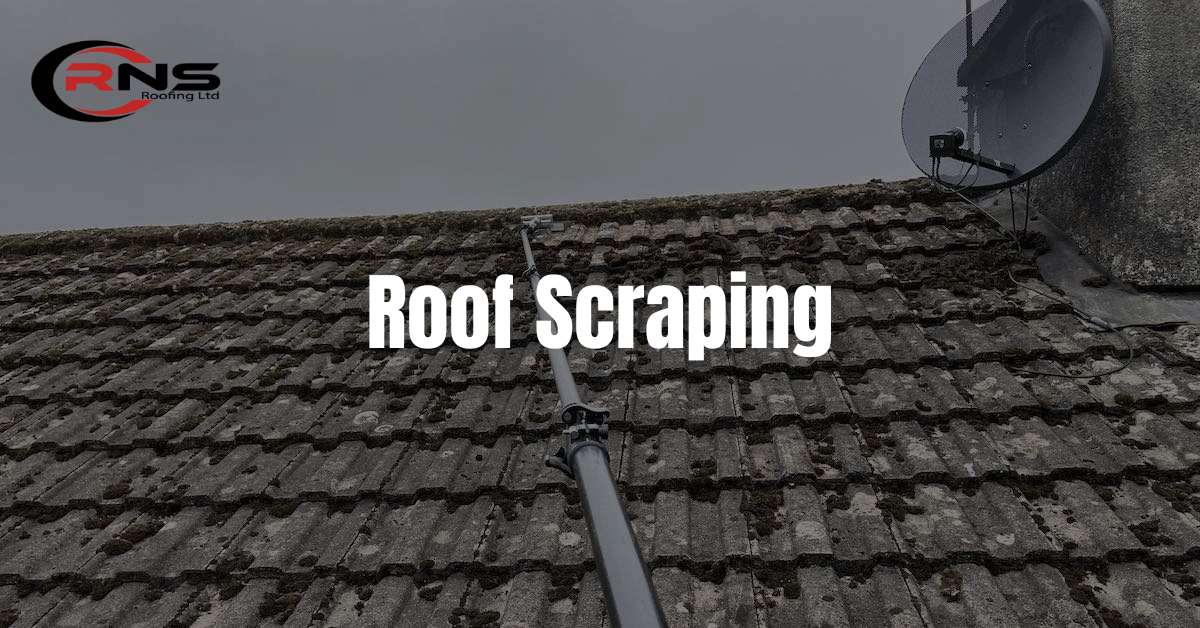
Roof scraping is a crucial part of maintaining your home’s roof, ensuring it remains free from moss, debris, algae, and dirt that can lead to damage over time. Neglecting this task can result in costly repairs or even complete roof replacements. With the right knowledge and tools, roof scraping can be an effective DIY task that extends the life of your roof and protects your investment. In this detailed guide, we’ll walk you through everything you need to know about roof scraping, including when and how to scrape, what tools you’ll need, safety precautions, and post-scraping care.

What is roof Scraping?
Roof scraping refers to the process of removing dirt, moss, algae, leaves, and other debris from the surface of your roof using special tools. This prevents the build-up of harmful substances that can compromise the roof’s structure, cause leaks, or even lead to mould and mildew growth. Over time, these contaminants can reduce the efficiency of your roof by causing moisture retention, damaging shingles, and blocking drainage systems.
Roof scraping is typically part of a comprehensive roof maintenance routine and is necessary for all types of roofs, whether residential or commercial.
Why Roof Scraping is Important:
Roof scraping isn’t just about keeping your roof looking clean; it has numerous practical benefits:
- Prevents Damage: Moss, algae, and debris hold moisture, which can weaken your roofing materials and lead to leaks or rot.
- Extends Roof Lifespan: Regular scraping can add 10 to 15 years to the life of your roof by preventing premature wear and tear.
- Maintains Curb Appeal: A clean roof improves the overall appearance of your home and can increase property value.
- Enhances Energy Efficiency: A clean roof reflects sunlight more efficiently, keeping your home cooler in warm weather, and thus reducing energy bills.
- Prevents Gutter Clogs: Roof debris often ends up in gutters, causing clogs and improper water drainage. By scraping, you can ensure gutters remain clear.
When Should You Scrape Your Roof?
It’s essential to time roof scraping correctly to avoid damage:
- After Autumn: Leaves, twigs, and debris are most common after fall, making this the ideal time for roof scraping.
- Before Winter: Scraping the roof before winter removes moss and debris that can trap moisture, which might freeze and expand, causing damage.
- After Storms: Heavy winds and rainstorms tend to displace branches, leaves, and dirt onto roofs, necessitating a post-storm clean-up.
Avoid scraping your roof during extreme weather or excessive heat, as it can damage certain roofing materials.
Tools and Equipment for Roof Scraping
Using the correct tools is essential for safe and effective roof scraping. Here’s a list of essential items:
- Ladder with stabilisers: A secure ladder to access the roof safely.
- Roof scraper or wire brush: These tools help to manually remove moss, algae, and debris.
- Putty knife: For scraping off stubborn grime or old roofing sealant.
- Pressure washer or hose: After scraping, wash the roof with water to remove loose debris.
- Safety gear: Wear protective gear, including non-slip boots, gloves, safety goggles, and a dust mask.
- Gutter guards or covers: To prevent scraped debris from clogging the gutters.
- Garbage bags: For collecting the debris you scrape off.
Roof Scraping Safety Tips You Must Know
When it comes to roof scraping, safety should always come first. Follow these essential tips to ensure you avoid injury and accidents:
Wear Proper Protective Equipment
Roof scraping can be hazardous, so wearing safety gear is critical. This includes:
- Safety glasses to protect your eyes from dust, debris, and scraping tools
- Hearing protection like earplugs or noise-cancelling headphones to block loud noises
- Steel-toed work boots for traction and to shield your feet
- Work gloves to protect your hands
- Dust masks to prevent inhalation of particles
Use Caution on the Roof
Roof scraping requires working on unstable, sloped surfaces. Exercise maximum caution to avoid slips and falls:
- Only work on roofs with a slope of 4/12 or less. Steeper roofs are too dangerous for amateur roof scraping.
- Place warning signs to alert others you are working on the roof.
- Use roof jacks, planks, or scaffolds for stability. Never overreach or overextend from your stable platform.
- Tie off safety harnesses for high or steep roofs to prevent falls.
- Only scrape in good weather conditions when the roof is dry. Avoid strong winds which can affect your balance and control.
Properly Store and Handle Tools
Roof scraping requires using sharp tools like putty knives, wire brushes, and paint scrapers. Follow these guidelines:
- Keep all tools securely stored in a toolbox when not in use. Unsecured tools can slide down the roof.
- Grasp tools carefully to avoid cuts and lacerations.
- Wear thick work gloves, especially when handling wire brushes.
- Ensure electrical tools like power washers are properly grounded to prevent electric shock.
- Never leave tools scattered on the roof where they can fall or cause tripping hazards.
Following essential safety practices allows roof scraping to be completed successfully without injury. Always put caution and care at the forefront of your work.
If You want Professional Roofing Services in Horsham And Surroundings Call Now: 07469 582272
Step-by-Step Guide to Scraping Your Roof
1. Inspect Your Roof:
Before scraping, thoroughly inspect your roof for damaged shingles, cracks, or weak spots. If you notice any major issues, consider hiring a professional for repairs before proceeding.
2. Set Up Your Ladder:
Use a sturdy ladder and ensure it’s set on flat, stable ground. If you’re working on a sloped roof, it’s important to use a roof harness to ensure safety.
3. Clear Loose Debris:
Start by clearing leaves, twigs, and dirt using a leaf blower or soft-bristled broom. This will make the actual scraping easier.
4. Start Scraping Moss and Algae:
Use a roof scraper or wire brush to remove moss, algae, and grime. Scrape in gentle, circular motions and avoid scraping too aggressively, especially on delicate materials like asphalt shingles or clay tiles.
5. Focus on Trouble Spots:
Pay special attention to areas prone to moss build-up, such as shady spots or areas around vents and chimneys.
6. Rinse the Roof:
After scraping, rinse the roof with a garden hose or pressure washer to clear off any remaining debris. Be careful not to use too high of a pressure setting as it could damage shingles or tiles.
7. Check Gutters:
Ensure that debris hasn’t fallen into the gutters. Use a gutter scoop or gloved hand to remove any obstructions and prevent clogs.
8. Inspect and Repair:
After cleaning, inspect your roof for any signs of damage that may have been hidden under the debris. Patch up any minor issues, such as loose shingles, missing nails, or cracked tiles.
Alternatives to Roof Scraping
While scraping is effective, it’s not always the best option for every situation. Here are some alternatives:
- Soft Washing: A gentler approach that uses a low-pressure water system and cleaning agents to remove dirt and moss without scraping.
- Roof Coating or Sealant: Applying a sealant can prevent moss and algae from growing in the first place, reducing the need for frequent scraping.
- Hiring a Professional: For larger or more complex roofs, or if you’re uncomfortable with DIY scraping, a professional roof cleaner can ensure the job is done correctly and safely.
Conclusion
After reading this guide, you will have all the information you need to start roof scraping. While it can seem daunting, with the right tools, safety equipment, and preparation, you can freshen up your roof and give your home exterior a new look. Take your time to evaluate if DIY roof scraping is right for your needs and abilities or if hiring a professional is a better option.
If you do it yourself, start by scraping a test area to build your confidence and skills. With patience and persistence, you’ll be well on your way to enjoying the satisfaction of a job well done and a roof ready for its next coat of protection. When you stand back and admire your transformed roof, the effort will be worth it. You’ve got this! Now, get out there and start scraping.
People Also Ask
Can I scrape my roof myself?
Yes, but it depends on your roof’s pitch and condition. Low-pitched roofs are easier, while steeper roofs may require professional help and safety gear like fall arrest systems.
What happens to the debris after scraping?
Debris like moss and algae should be bagged and disposed of to prevent blockages in gutters and downpipes, which can cause water damage and leaks.
Is roof scraping always necessary?
Not always. Roof scraping is ideal for removing heavy moss or algae. If there’s only light debris, a standard cleaning may be enough.

