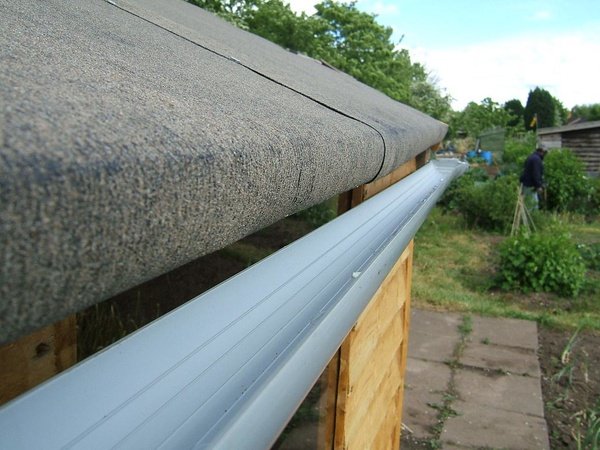
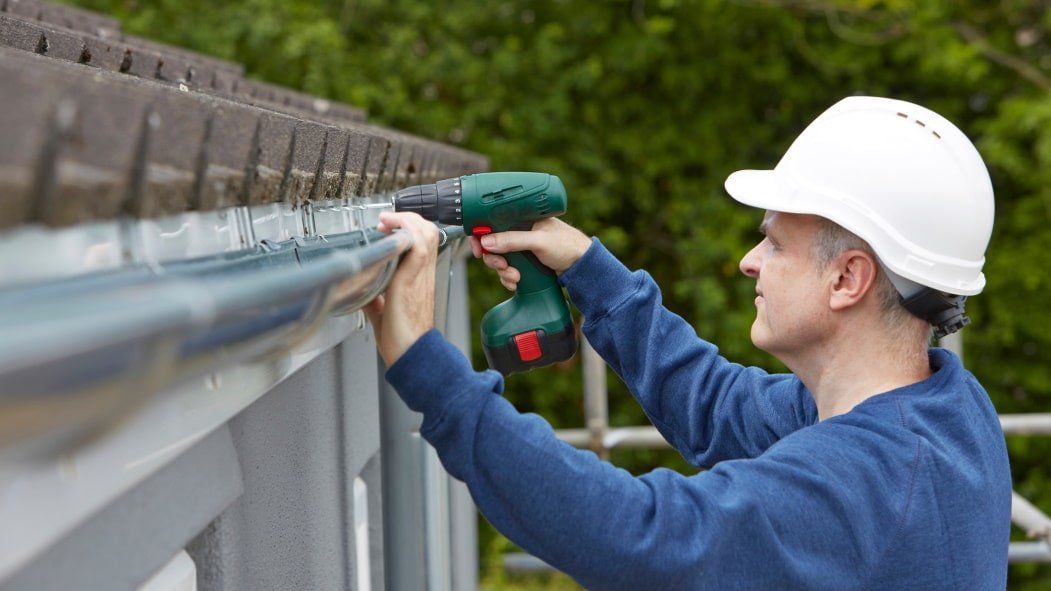
Guttering is a system of troughs and downspouts constructed along the eaves of a roof to collect and move rainfall away from the building’s base. It often includes gutter sections, downspouts, elbows, and brackets. Guttering may seem like a minor component of shed maintenance, but its importance cannot be emphasized. Imagine your shed sitting quietly in your backyard, protecting your tools and equipment or functioning as a nice refuge. In this article, I will review the technicalities of installing guttering on a shed, providing a detailed overview of how to install guttering on a shed.
You’ll learn about the importance of guttering, its benefits, and how to install guttering on a shed. By the end of this guide, you’ll understand the importance of guttering and have the knowledge and confidence to install and maintain a strong guttering system, ensuring that your shed stays sturdy and resilient for many years.

Benefits of Installing Guttering on a Shed
Guttering is the first line of protection against water damage, moving rainwater away from your shed’s base. Rain can pool around the shed’s base without correct guttering, causing structural difficulties such as rot, mould growth, and foundation erosion.
- Prevents soil erosion: Guttering avoids soil erosion around the foundation by channelling water away from the shed, thus protecting the structure’s stability.
- Protects outside Surfaces: Guttering shields the shed’s outside walls, doors, and windows from water damage, extending their life and keeping their beauty.
- Preserve Aesthetic Appeal: By eliminating water stains and discolouration, guttering helps maintain your shed’s aesthetic appeal, ensuring it stays an appealing part of your home.
Tools and Materials required
- Gutter sections
- Downspouts
- Brackets
- Screws
- Sealant
- Measuring tape
- Chalk line
- Ladder
Step-by-Step Guide For How To Install Guttering On A Shed

Attach Gutter Brackets: Screw or nail the gutter brackets to the shed’s fascia board at the designated locations. Ensure that the brackets are regularly placed and properly fastened to hold the weight of the gutter sections.
Install Gutter Sections: Snap the gutter components in place, beginning at one end of the shed and working your way down the eaves. To ensure proper water drainage, align the gutter sections with the chalk line and slope gently towards the downspout outlets.
Connect Gutter Sections: Use corner pieces and connectors to connect gutter sections at corners and angles. Apply waterproof sealant to the joints to prevent leaks and maintain a watertight seal.
Install Downspouts: Place the downspouts along the shed’s eaves in predefined areas and fasten them to the wall with brackets or straps. Ensure the downspouts are firmly fixed and extend below ground level to divert water from the foundation.
Test the System: Once the guttering system is installed, pour water into the gutters and see how it flows toward the downspouts. Check for leaks, obstructions, and overflows, and make any necessary adjustments or repairs.
Tips For Common Issues
Leaking: Despite regular maintenance, you may encounter common guttering issues that require prompt attention and repair. Here are some troubleshooting tips for addressing common guttering problems:
Sagging: Check the gutter brackets and connections for evidence of sagging or detachment. Tighten loose screws or replace damaged brackets to keep the gutters from sagging.
Overflowing: If your gutters overflow during severe rains, look for clogs or obstructions in the downspouts. Clear any debris and ensure that water flows freely to avoid overflow.
Pooling Water: If water accumulates at the shed’s base or along the gutters, look for inappropriate slope or drainage concerns. Adjust the gutter slope and downspout positions to divert water away from the shed and prevent pooling.
Maintenance and Care Tips
Regular cleaning and inspection are vital for maintaining the performance of your guttering system and preventing problems such as obstructions, leaks, and overflows. Here are some maintenance methods to maintain your shed gutters in good condition:
- Remove leaves, twigs, and dirt from the gutters using a scoop or trowel.
- Inspect the gutters, downspouts, brackets, and connections for signs of damage, corrosion, or wear and tear.
- Use a level to ensure the gutter sections have the proper slope for effective water drainage to the downspouts.
- Check the downspouts for obstructions or blockages caused by debris or nesting animals.
- Trim any overhanging branches or foliage near the shed gutters to keep leaves, twigs, and debris from gathering and causing jams.
Conclusion
Finally, installing gutters on your shed is an important step toward protecting your investment and preserving its durability.
Guttering successfully redirects precipitation away from the shed’s base, protecting it from water damage, structural problems, and aesthetic degradation.
With careful consideration, appropriate design, and attention to detail, you may effectively install a guttering system to improve the functioning and durability of your shed.
To keep your guttering system in good working order, choose the right materials, stick to regular cleaning and inspection procedures, and solve any faults as soon as possible.
By following the instructions I provide in this article, you can confidently start your gutter installation, knowing you’re taking proactive steps to safeguard your shed from the destructive effects of water infiltration.
FAQs
Why do plastic gutters leak?
When it comes to gutter joints, the most common cause of a leak is the seal. This can be down to improper installation, wear and tear, or even just a bit of grit that worked its way in between the seal and the gutter.
How to waterproof a gutter?
Hammer the end cap securely into place, ensuring a tight fit, and apply a generous amount of sealant around the edges to create a waterproof seal.
What is the lifespan of gutters?
Gutters can last anywhere from 20 to 50 years, or even up to 100 years in some cases.

